
When it comes to preparing for emergencies or off-grid living, having a stash of nutritious and reliable survival foods can be a lifesaver. While canned goods and MREs have their place, there’s something special about biting into a warm, homemade biscuit or savoring a flavorful jerky strip. In this article, we’ll dive into 18 essential recipes for long-term food storage that will keep you fueled and satisfied even in the most challenging times.
From classic camping staples like beef jerky and trail mix to innovative uses for pantry staples like oats and beans, these recipes are designed to be easy to make, store well, and provide a nutritional boost when you need it most. Whether you’re preparing for a natural disaster, a power outage, or simply want to stock your pantry with a little extra insurance, these 18 essential survival food recipes will get you started on the right foot.
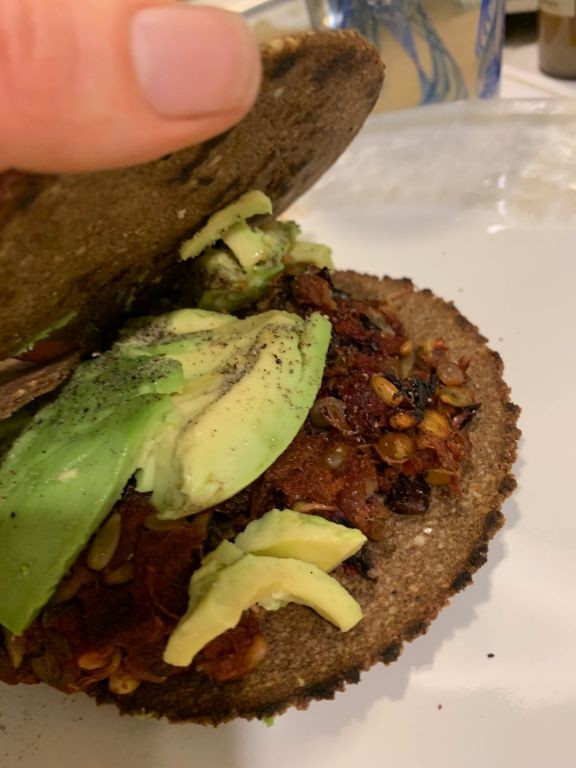
Hardtack Biscuits

Hardtack biscuits have been a staple in military rations and pioneer kitchens for centuries, prized for their durability and long shelf life. With just a few simple ingredients, you can make these iconic biscuits at home.
Ingredients:
– 2 cups all-purpose flour
– 1/4 teaspoon salt
– 1/4 teaspoon baking powder
– 1/2 cup water
Instructions:
1. Preheat your oven to 350°F (180°C).
2. In a large mixing bowl, combine the flour, salt, and baking powder.
3. Gradually add the water, stirring until a dough forms.
4. Knead the dough for 5-7 minutes until it becomes smooth and pliable.
5. Roll out the dough to about 1/4 inch thickness.
6. Cut into desired shapes or simply cut into squares.
7. Bake for 20-25 minutes, or until lightly browned.
Cooking Time: 20-25 minutes
These hardtack biscuits are perfect for snacking on the go or as a base for your favorite toppings and fillings.
Pemmican Protein Bars

A classic outdoor treat gets a modern twist with these protein-packed bars, perfect for hiking, camping, or just a quick energy boost.
Ingredients:
– 2 cups rolled oats
– 1 cup dried fruit (cranberries, raisins, apricots)
– 1/2 cup chopped nuts (almonds, walnuts)
– 1/4 cup honey
– 1/4 cup peanut butter
– 1 scoop vanilla protein powder (20g)
– Pinch of salt
Instructions:
1. In a large bowl, combine oats, dried fruit, and nuts.
2. In a small saucepan, heat honey and peanut butter over low heat until smooth.
3. Stir in vanilla protein powder and salt.
4. Pour wet mixture into dry ingredients; mix until well combined.
5. Press mixture into a lined or greased 8×8 inch baking dish.
6. Refrigerate for at least 30 minutes to set.
7. Cut into bars (12-16).
Cooking Time: 30 minutes
Homemade Beef Jerky
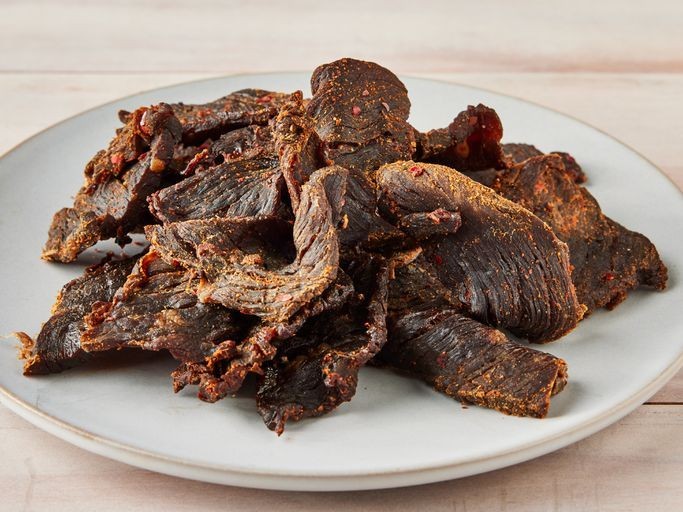
Savor the flavor of tender and juicy beef jerky made fresh at home with just a few simple ingredients. This recipe yields a deliciously chewy snack that’s perfect for on-the-go.
Ingredients:
– 1 pound beef strips (top round or flank steak)
– 1/4 cup soy sauce
– 1/4 cup brown sugar
– 2 tablespoons Worcestershire sauce
– 2 teaspoons garlic powder
– 1 teaspoon onion powder
– Salt and pepper, to taste
Instructions:
1. Preheat oven to its lowest temperature setting (usually around 150°F).
2. In a large bowl, whisk together soy sauce, brown sugar, Worcestershire sauce, garlic powder, onion powder, salt, and pepper.
3. Add the beef strips to the marinade, making sure they’re coated evenly. Cover and refrigerate for at least 4 hours or overnight.
4. Line a large baking sheet with parchment paper or aluminum foil. Remove the beef from the marinade, letting any excess liquid drip off.
5. Place the beef strips on the prepared baking sheet in a single layer, leaving some space between each piece.
6. Cook for 3-4 hours, or until the jerky reaches your desired level of dryness.
Cooking Time: 3-4 hours
Canned Beans and Rice

This hearty recipe is a quick and easy way to enjoy a flavorful meal using canned beans and rice. Perfect for busy weeknights or when you’re in need of a comforting bowl of goodness.
Ingredients:
– 1 can black beans, drained and rinsed
– 1 cup cooked white rice
– 1 tablespoon olive oil
– 1 small onion, diced
– 2 cloves garlic, minced
– 1 teaspoon cumin
– Salt and pepper to taste
– Optional: chopped fresh cilantro for garnish
Instructions:
1. Heat the olive oil in a large skillet over medium heat.
2. Add the diced onion and cook until translucent, about 3-4 minutes.
3. Add the minced garlic and cook for an additional minute.
4. Stir in the cumin and cook for 30 seconds.
5. Add the canned black beans and cooked rice to the skillet. Stir until well combined.
6. Season with salt and pepper to taste.
7. Serve hot, garnished with chopped cilantro if desired.
Cooking Time: 15-20 minutes
Dehydrated Vegetable Soup Mix
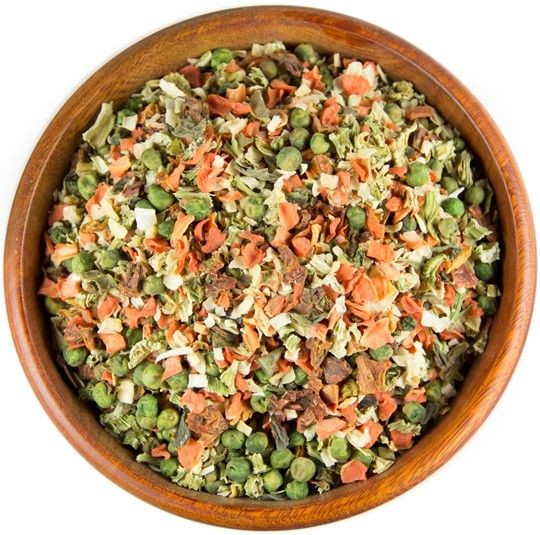
Revive the flavors of a hearty soup with this convenient and easy-to-make mix, perfect for a quick lunch or dinner.
Ingredients:
– 2 cups dehydrated vegetable mix (containing carrots, celery, potatoes, onions, and green beans)
– 1 tablespoon vegetable oil
– 4 cups water
– Optional: 1 teaspoon dried thyme, salt to taste
Instructions:
1. In a large pot, heat the oil over medium heat.
2. Add the dehydrated vegetable mix and stir to combine with the oil.
3. Gradually add the water, whisking continuously to prevent lumps from forming.
4. Bring the mixture to a boil, then reduce heat and simmer for 10-15 minutes or until the soup has reached your desired consistency.
5. Taste and adjust seasoning as needed. If using thyme, add it during the last minute of cooking.
Cooking Time: 10-15 minutes
Bannock Bread

Bannock bread is a simple, unleavened flatbread that has been a staple in many Native Canadian communities for centuries. This recipe makes a delicious and crispy bannock that’s perfect for snacking or serving with soups and stews.
Ingredients:
– 2 cups all-purpose flour
– 1/4 teaspoon salt
– 1/4 cup warm water
– 1 tablespoon vegetable oil
Instructions:
1. In a large bowl, combine the flour and salt.
2. Gradually add the warm water to the dry ingredients, mixing until a dough forms.
3. Knead the dough for 5-7 minutes until it becomes smooth and pliable.
4. Divide the dough into 2-3 equal portions, depending on how large you want your bannocks to be.
5. Roll out each portion into a thin circle, about 1/8 inch thick.
6. Heat the vegetable oil in a non-stick skillet over medium heat.
7. Cook the bannock for 30-45 seconds on each side, until it’s golden brown and crispy.
Cooking Time: 2-3 minutes per bannock
Survival Oatmeal Packets
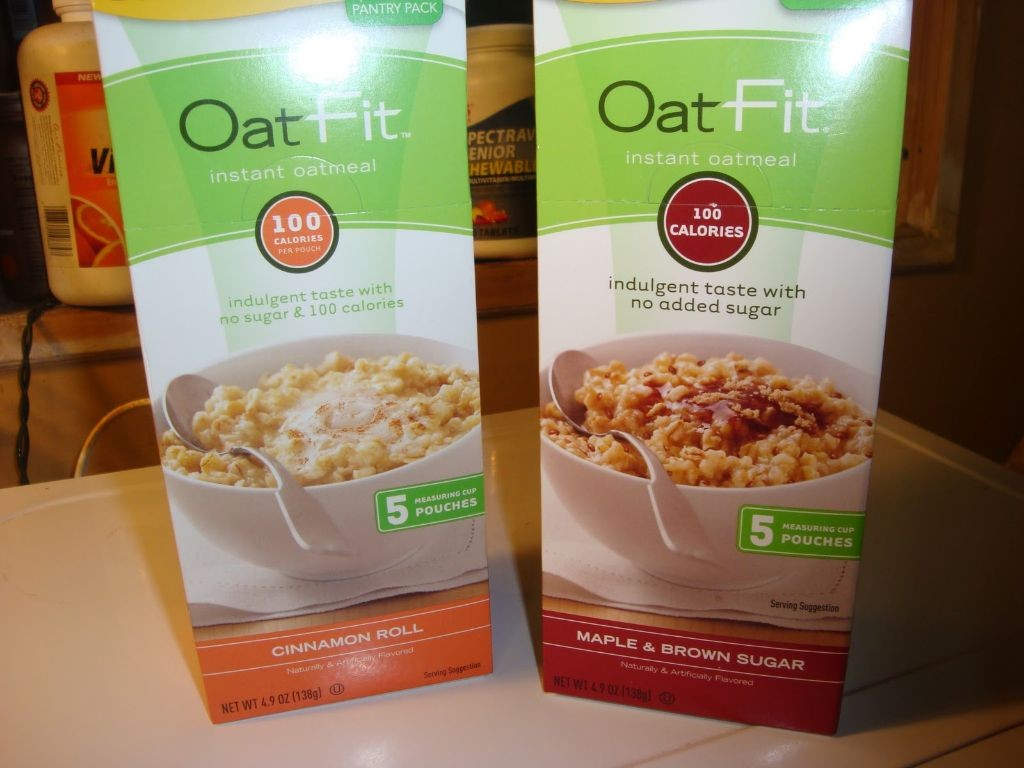
In the midst of a wilderness survival situation, having a reliable and sustaining breakfast can be a game-changer. These Survival Oatmeal Packets provide a compact and nutritious meal to fuel your journey.
Ingredients:
– 1 cup rolled oats
– 1/2 cup dried fruit (cranberries, raisins, or cherries)
– 1 tablespoon honey or maple syrup
– 1/4 teaspoon salt
– 1/4 teaspoon baking powder
Instructions:
1. In a zip-top plastic bag, combine oats, dried fruit, and salt.
2. Add honey or maple syrup to the mixture and stir until well combined.
3. Add baking powder and mix until the ingredients are evenly distributed.
4. Fold the top of the bag over the mixture, ensuring it is tightly sealed.
Cooking Time: 5-7 minutes
To cook, simply add boiling water to the contents of the packet and stir. Let sit for 5-7 minutes before consuming. This recipe provides a lightweight and easy-to-prepare breakfast that can be enjoyed in even the most challenging survival situations.
DIY Trail Mix

Get ready to fuel your outdoor adventures with a delicious and convenient DIY trail mix! This recipe is easy to make, customizable, and packed with nutritious ingredients.
Ingredients:
– 2 cups mixed nuts (almonds, cashews, pecans)
– 1 cup dried fruit (cranberries, raisins, cherries)
– 1/2 cup pretzels
– 1/2 cup dark chocolate chips (at least 70% cocoa)
– 1/4 cup puffed rice cereal
– 1 tablespoon honey
Instructions:
1. In a large bowl, combine the mixed nuts and dried fruit.
2. Add the pretzels, dark chocolate chips, and puffed rice cereal to the bowl. Stir until well combined.
3. Drizzle the honey over the mixture and stir until everything is coated evenly.
4. Serve immediately or store in an airtight container for up to 5 days.
Cooking Time: None! This recipe requires no cooking, just mixing and munching.
Salt-Cured Meat

This recipe yields a deliciously flavorful and tender salt-cured meat that’s perfect for snacking or adding to salads, sandwiches, and more. With just a few simple ingredients and steps, you can create this mouthwatering treat in no time.
Ingredients:
– 1 pound beef brisket or pork shoulder, sliced into thin strips
– 1 cup kosher salt
– 1/2 cup brown sugar
– 1 tablespoon black pepper
– 1 tablespoon pink curing salt (optional)
– 1 cup water
Instructions:
1. In a small bowl, mix together kosher salt, brown sugar, and black pepper.
2. Place the sliced meat in a shallow dish or tray. Sprinkle the salt mixture evenly over the meat, making sure to cover all surfaces.
3. If using pink curing salt, sprinkle it evenly over the meat as well.
4. Allow the meat to cure at room temperature for 24 hours.
5. After 24 hours, rinse the meat under cold running water to remove excess salt. Pat dry with paper towels.
6. Store the cured meat in an airtight container in the refrigerator for up to 2 weeks.
Cooking Time: None required – just enjoy and serve!
Powdered Milk Pancakes

Start your day with a stack of fluffy, tender pancakes made with the convenience of powdered milk.
Ingredients:
– 1 1/2 cups all-purpose flour
– 3 1/2 teaspoons baking powder
– 1 teaspoon salt
– 1 cup powdered milk
– 1 large egg
– 1 tablespoon vegetable oil
– 1 tablespoon sugar
– Butter or syrup for serving (optional)
Instructions:
1. In a medium bowl, whisk together flour, baking powder, and salt.
2. In a separate bowl, whisk together powdered milk, egg, and sugar until smooth.
3. Add the dry ingredients to the wet ingredients and stir until just combined.
4. Heat a non-stick skillet or griddle over medium heat.
5. Drop 1/4 cupfuls of batter onto the skillet and cook for 2-3 minutes, until bubbles appear on surface.
6. Flip and cook an additional 1-2 minutes, until golden brown.
Cooking Time: 10-12 minutes (depending on number of pancakes)
Instant Mashed Potatoes

Quick and Easy Instant Mashed Potatoes Recipe
Get a delicious and comforting side dish on the table in no time with this simple recipe using instant mashed potatoes!
Ingredients:
– 1 package of instant mashed potatoes (6-8 servings)
– 2 cups of water
– 2 tablespoons of butter, melted
– Optional: salt to taste, garlic powder for added flavor
Instructions:
1. Open the package of instant mashed potatoes and pour the contents into a large bowl.
2. Gradually add in the 2 cups of warm water, stirring with a fork until the mixture is smooth and creamy.
3. Add the melted butter and stir until fully incorporated.
4. Taste and adjust seasoning as needed (optional).
5. Serve hot!
Cooking Time: Approximately 10-15 minutes
Smoked Fish Fillets
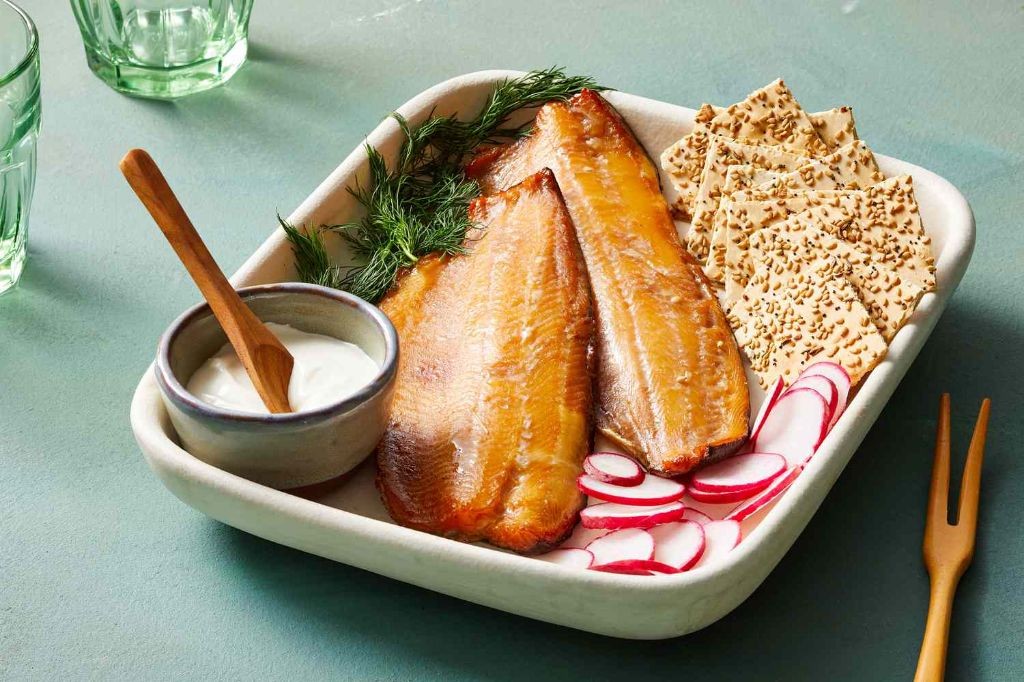
Get ready to elevate your seafood game with this simple and flavorful recipe for smoked fish fillets. Perfect for a light and refreshing meal or as an impressive appetizer, these delicate fillets are infused with the rich flavors of wood smoke.
Ingredients:
– 4 fish fillets (such as salmon, trout, or tilapia)
– 1 cup wood chips (applewood or alderwood work well)
– 2 tablespoons olive oil
– 2 cloves garlic, minced
– 1 teaspoon lemon zest
– Salt and pepper to taste
Instructions:
1. Preheat your smoker to 225°F.
2. In a small bowl, mix together olive oil, garlic, and lemon zest.
3. Place the fish fillets in a single layer on the smoker rack.
4. Brush the fish with the olive oil mixture, making sure each piece is coated evenly.
5. Add wood chips to the smoker according to manufacturer’s instructions.
6. Smoke the fish for 2-3 hours, or until it reaches an internal temperature of 145°F.
7. Remove from heat and let rest for 10 minutes before serving.
Cooking Time: 2-3 hours
Emergency Peanut Butter Fudge

Emergency Peanut Butter Fudge: A Quick Fix for Cravings!
When you need a sweet fix, this emergency peanut butter fudge recipe is here to save the day. With just a few simple ingredients and minimal cooking time, you’ll be indulging in creamy, nutty goodness in no time.
Ingredients:
– 1 cup (200g) creamy peanut butter
– 1/2 cup (100g) confectioners’ sugar
– 1/4 teaspoon salt
– 1 tablespoon unsalted butter
– 1 teaspoon vanilla extract
Instructions:
1. Line a small baking dish or a microwave-safe mug with parchment paper.
2. In a medium-sized bowl, combine peanut butter, confectioners’ sugar, and salt. Mix until smooth and creamy.
3. Add the butter and vanilla extract to the peanut butter mixture. Stir until fully incorporated.
4. Pour the mixture into the prepared baking dish or mug.
5. Microwave on high for 30-45 seconds, or cook in a preheated oven at 350°F (175°C) for 10-12 minutes, or until the fudge is set.
Cooking Time: 30-45 seconds (microwave), 10-12 minutes (oven)
Dehydrated Fruit Leather

Transform fresh fruit into a healthy, portable snack with this easy recipe.
Ingredients:
– 2 cups mixed fruit (such as strawberries, blueberries, raspberries, or any combination)
– 1 tablespoon honey (optional)
– 1 sheet of parchment paper or dehydrator trays
Instructions:
1. Preheat your oven to its lowest temperature setting (usually around 150°F).
2. Wash and hull the fruit, then puree it in a blender or food processor until smooth.
3. If desired, add honey to sweeten the mixture. Mix well.
4. Line a baking sheet with parchment paper or use dehydrator trays.
5. Pour the fruit mixture onto the prepared surface, spreading evenly to about 1/8 inch thickness.
6. Place the sheet in the oven or dehydrator and dehydrate for 3-4 hours, or until the fruit leather reaches your desired level of dryness.
Cooking Time: 3-4 hours
Cornmeal Mush

Warm up with a comforting bowl of cornmeal mush, a classic Appalachian dish that’s easy to make and filling to eat. This recipe is perfect for a chilly morning or as a side dish for your favorite comfort foods.
Ingredients:
– 2 cups water
– 1 cup stone-ground yellow cornmeal
– 1/4 teaspoon salt
– 2 tablespoons butter, melted
Instructions:
1. In a medium saucepan, bring the water to a boil.
2. Gradually whisk in the cornmeal and salt until smooth.
3. Reduce heat to low and cook for 5-7 minutes or until the mush thickens.
4. Stir in the melted butter until fully incorporated.
5. Serve hot.
Cooking Time: 10-12 minutes
Wild Edible Greens Salad

Discover the flavors of the wild with this simple salad recipe featuring a mix of foraged greens. This dish is perfect for adventurous eaters and nature lovers who want to add some excitement to their meals.
Ingredients:
– 2 cups mixed wild edible greens (such as dandelion, chicory, plantain, or purslane)
– 1/4 cup chopped fresh mint leaves
– 1/4 cup crumbled goat cheese (optional)
– 1 tablespoon olive oil
– 1 tablespoon apple cider vinegar
– Salt and pepper to taste
Instructions:
1. Rinse the wild greens with water and pat dry.
2. In a large bowl, combine the mixed greens, chopped mint leaves, and crumbled goat cheese (if using).
3. Drizzle the olive oil and apple cider vinegar over the salad.
4. Season with salt and pepper to taste.
5. Serve immediately and enjoy!
Cooking Time: 0 minutes (no cooking required)
Acorn Flour Flatbread
Experience the unique flavor of acorn flour with this simple recipe for a delicious and nutritious flatbread. Perfect as a side dish or used as a wrap for your favorite fillings.
Ingredients:
– 1 cup acorn flour
– 1/4 cup water
– 1/4 teaspoon salt
– 1 tablespoon olive oil
Instructions:
1. In a large bowl, combine acorn flour and salt.
2. Gradually add in water and mix until a dough forms.
3. Knead the dough for 5 minutes until smooth and elastic.
4. Divide the dough into 2-3 equal portions.
5. Roll out each portion into a thin circle, about 1/8 inch thick.
6. Brush both sides with olive oil.
7. Heat a non-stick skillet or griddle over medium-high heat.
8. Cook flatbread for 30 seconds on each side, until lightly browned.
Cooking Time: 2 minutes per flatbread
Canned Tuna and Crackers

This classic snack is a staple for many – it’s easy to make, requires minimal preparation, and is perfect for a quick pick-me-up. With just a few simple ingredients, you’ll have a satisfying treat in no time.
Ingredients:
– 1 can of canned tuna (drained)
– 2-3 crackers (your choice of type and number)
– Salt to taste
– Optional: lemon juice or chopped onion for added flavor
Instructions:
1. Open the can of tuna and drain the liquid.
2. Place the tuna on top of a cracker.
3. Add another cracker on top of the tuna, creating a “sandwich”.
4. Sprinkle with salt to taste.
5. If desired, add a squeeze of lemon juice or some chopped onion for extra flavor.
Cooking Time: None! This snack is ready in seconds.
Summary
In this article, we share 18 essential survival food recipes for long-term storage. From classic staples like Hardtack Biscuits and Canned Beans and Rice to more innovative options like Pemmican Protein Bars and DIY Trail Mix, these recipes are designed to provide sustenance in any emergency situation. With a focus on non-perishable ingredients and simple preparation methods, you can stock your pantry with confidence. Whether you’re preparing for a natural disaster or simply looking to build a food cache, this collection of survival food recipes has got you covered.